Horton Brasses was featured in the October 2001 issue of Professional Refinishing, the magazine of the wood restoration industry.
The Beauty of Brass
by Barbara Rockwell
Hardware is more of a challenge than you might think: Often it is missing and sometimes it is broken - or the original has been replaced with a lower quality or historically inaccurate substitute. Whatever the case, says brass supplier Barbara Rockwell, it's helpful to know how brasses are made to decide what to do when a piece you're working on has a hardware issue that must be resolved.
Getting the hardware right is an important job for a re-finisher. Often, in fact, the hardware is the first thing your client will touch after you've spent hours restoring or touching up the wood.
If the hardware is missing or broken or compromised in some other way, it's up to you to replace it with something suitable. Poor quality or mismatched hardware will cheapen even the most beautiful piece of cabinetry, while quality hardware in good condition can add significant merit to an otherwise mediocre piece.
What is quality hardware? In this photo essay, I'll show you some of the 13 steps involved in producing a single handle - or in the language of hardware, a bail - to give you an idea of what's involved in manufacturing fine brasses at our company.
As you'll see, it's a time-consuming, labor-intensive process, but when it's done efficiently, real quality and authenticity can be delivered at quite reasonable prices. Our company, for example, can manufacture most replacement drawer pulls.
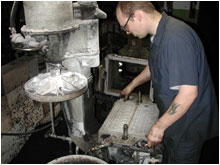
1. To make a mold into which brass can be poured to produce castings, a pattern is laid in sand that has been leveled to the top of the bottom half of the box. Here the pattern consists of 8 bails of one type and 16 of another.
2. The top half of the box, seen in the background of the preceding photograph, is placed on the bottom half. Sand is then sifted into it and compacted tightly.
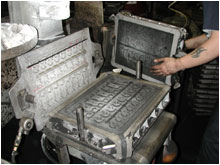
3. The two parts of the mold are separated and the pattern is removed. Then the two parts are placed back together, ready now to accept the brass.
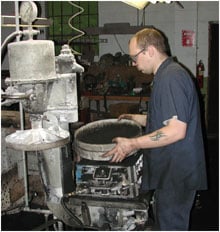
4. Molten brass is poured into the mold.
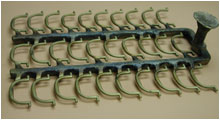
5. Here's what the parts look like when they come out of the mold.
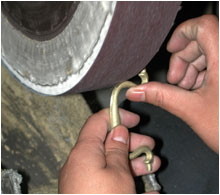
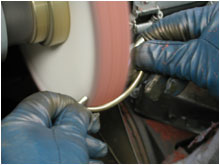
6. Each of the cast parts has to be hand-ground to remove the parting line - the thin layer of brass that is left where the two halves of the sand mold came together. This photo shows grinding the outside of the bail.
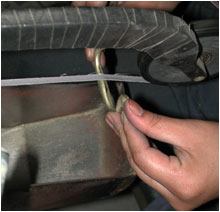
7. Here the inside of the bail is being ground.
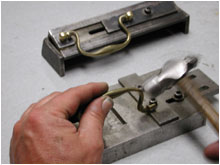
8. Each bail then has to be milled to make the nibs a consistent size so they will swing freely on the posts.
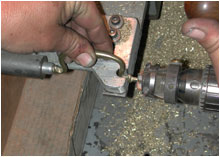
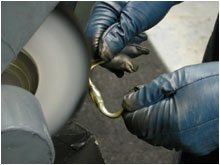
9. Every bail must be adjusted for size so it will fit reliably in the post-holes. In addition, all bails are checked at this point for straightness, form, and shape.
10. We offer three finishing processes: antique, semi-bright, and polished brass. The step shown here is called soft-wheeling, in which an abrasive paste is used to clean the surface before applying the semi-bright or bright polish.
11. The polished-brass finish is the most labor-intensive, involving polishing with a series of wheels and grades of compound.
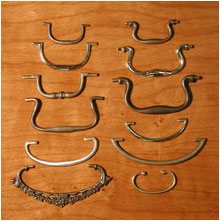
12. Here are 12 different shapes of handles commonly found on old furniture, in all of the three finishes we apply - antique, semi-bright, and polished brass.