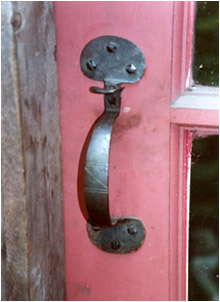
This is one of the first Suffolk style latches we made. It is used every day on one of Molly's shop doors. You can see where Sootypaws comes from by the dirty finger smudges on the door around the latch.
This latch has a bean style cusp.
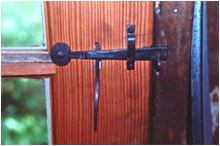
On the other side of the door is the bar, keeper and catch. The thumber tail raises the bar when the thumber is depressed. The keeper restricts the bar's motion. If the thumber is pressed down enough, the bar will lift out of the catch and one can open the door.
Beginning the Forging
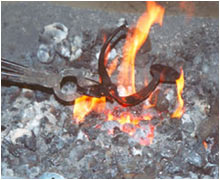
We forge the latches in a coal forge, heating the mild steel to about 1800°. The metal cools quickly while under the hand hammer and some processes require several heats. Our tools are simple, a coal forge with a hand operated blower, a 2 pound hammer (we use several styles depending on the effect needed), tongs that hold the stock, vise and our anvil, in this case weighing about 150 pounds. The forge, anvil and vise are placed close together. The vise is a 180° turn from the forge. The anvil, between the forge and vise, is one step away from the forge.
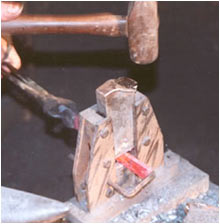
During the initial stages of forging we use an additional tool called a blacksmith helper, or guillotine swage. We are able to use different dies, and a gauge to help position stock, to achieve different aims. During the beginning of the forging we use the blacksmith helper to set out the amount of stock for the top and bottom cusps.
Heats 1 & 2
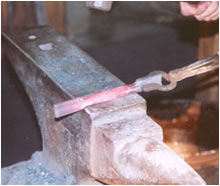
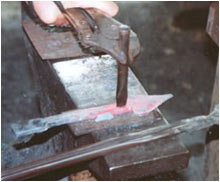
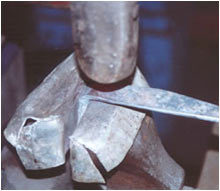
We use the blacksmith helper to fuller the stock to separate the material used for the cusp from the material used for the grip part of the latch.
Heats 1 & 2
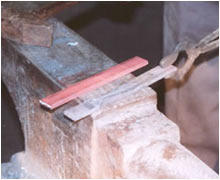
The first heat is finished. The stock is forged behind the fullered mark into the grip area. The piece of original sized stock is shown. We use a piece of mild steel that is 1/4 inch thick, 3/4 inches wide and 7 inches long. If we were making a bean latch the stock would be 6 inches long.
Heat 2
The stock is being forged at the other end in the grip section of the bar.
Heats 3 & 4
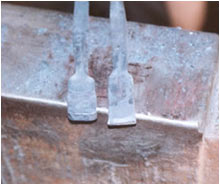
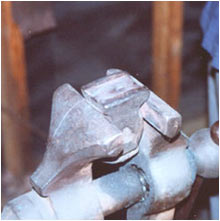
We've upset the material for the cusp, driven it back onto itself while hot, holding it in the vise, so that it will be thicker. This will give us more metal when spreading the cusp.
The piece to the left has been upset, the piece on the right is original size.
Heats 5
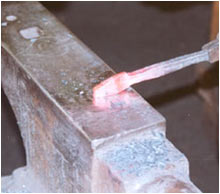
To start to create the heart shape on the cusp we put a point on the end of the cusp portion of the stock after upsetting it. This photo shows the point about half way through the heat. The stock will be drawn to a sharper point.
Finishing the Top Cusp and Cutting the Slot
Two more heats are used to finish the basic shaping of the cusp. Then the process of cutting the slot for the thumber is begun.
Heats 6 & 7
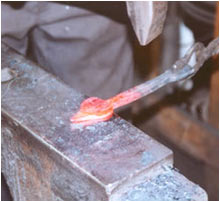
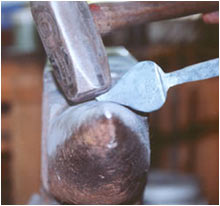
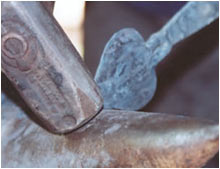
We use the peen of the hammer versus the face to start the spreading of the heart shape on the cusp. This takes two heats.
Heat 7
The point on the cusp is refined using the face of the hammer (this two pound hammer has a rounder face for doing this) and the horn of the anvil.
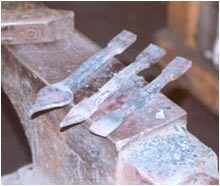
Up through heat 7
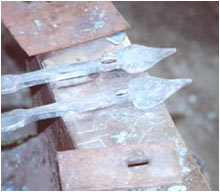
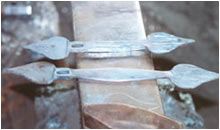
The three basic stages of the initial forging are shown: separating material for cusps from grip, pointing the cusp and starting the spreading of the stock for the cusp.
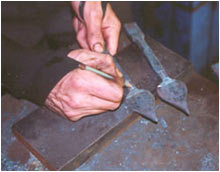
Marking out for slot
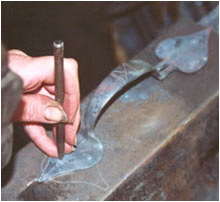
We use a silver pencil to mark out where the slot goes just below the cusp at the top of the latch.
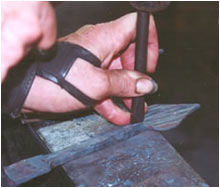
Marking with chisel
We use a cold chisel to put a mark on the stock that we can "feel" with the hot cutting chisel.
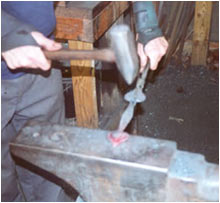
Heats 8 through 12
Heat 8 uses a dull red heat to start the slot cut with a hot chisel. At a higher heat the slot is cut through the stock. This photo shows heat 10 where the slot is drifted with the chisel. Heats 11 and 12 use a drift to finish creating the slot the proper size.
Heat 12
The slot has been cut and drifted to size so that the thumber piece will fit properly. The bolster plate which supports the stock during drifting is shown at the bottom of the photo.
Forging the Grip
After the slot is formed the bottom cusp is started in the same way as heats 5 through 7. The grip portion of the latch is forged next.
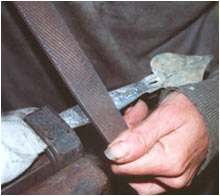
Heats 16 through 22
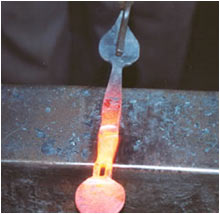
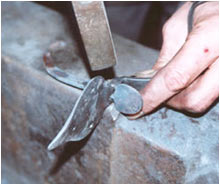
The grip portion of the latch is forged in 7 heats. Two heats are used to start the grip at the bottom, two at the top near the slot (shown here -- we are using the edge of the anvil to create the offset between the slot mass and the grip), one to spread the center of the grip some and two final heats to refine the shape and draw the grip to the correct length.
Heat 21
The latch grip is almost finished. This heat (with pieces of scale flying) is the next to the last, refining the shape of the grip at the bottom.
Swage Tool
This photo shows an old top swage held in the vise. This tool is used to round the upper surface of the grip.
Heat 23
The stock is placed face down in the tool and is hammered on the back. This rounds the top of the grip slightly and smooths out the hammer marks.
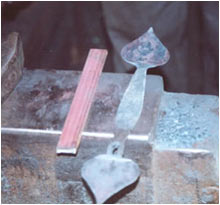
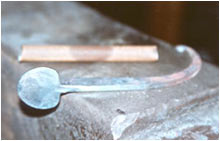
The grip is formed
The top forging shows the bottom cusp started (at the end of heat 15). The bottom forging shows the latch almost finished at heat 23.
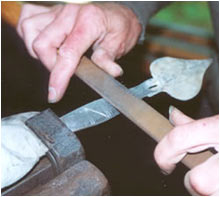
Filing the grip edges
Before final forging of the cusps the grip edges are filed. The stock is held in a vise and filed with a 14 inch bastard file to refine the final shape of the grip portion of the latch.
Final Forging of the Cusps and Filing the Latch Grip
The latch forging is finished when the cusps are final-forged. A grinder is used to refine the shape of the cusp and the edge of the cusp is filed so that the form is balanced. A design is chiseled lightly into the grip. The design is filed and the grip is filed smooth overall.
Heats 24 through 28
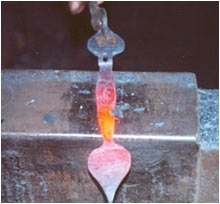
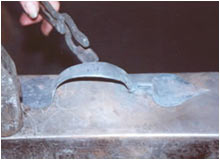
The cusp is spread to its final size (a pattern is drawn onto the anvil face as a reference). After the top cusp is finished, the slot is redrifted. The bottom cusp is finished last.
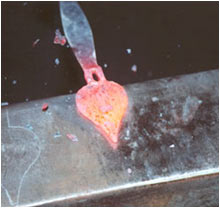
In this picture you can see the scale flying after a blow of the hammer.
Heat 25
The cusp point is drawn further on the horn with the hammer at the end of final spreading with the face of the hammer.
Heats 27 & 28
The bottom cusp is spread even more with the peen of the hammer in heat 27 and finally, in the next heat, spread and refined with the face of the hammer.
Through heat 28
The original size of stock is shown at the left and the final forging is shown to the right.
Filing the grip
The grip, after the design is filed, receives an overall smoothing with several files descending from coarse to fine. The forging is held in the vise with a special tool -- a piece of rag helps protect the surface.
Final draw filing
The last stage of filing is draw filing the surface, dragging the file perpendicularly across the grip.
Shaping the Latch Grip
After the latch is filed, both grip ends are heated and bent in the vise using a hammer. The stock is then heated overall and shaped over a jig to create the latch grip. Finally the cusps and latch are straightened on the anvil, holes are punched and the final straightening and flattening of the cusps takes place.
Heat 29
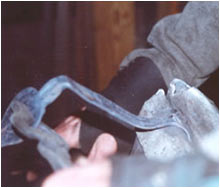
The latch grip is first bent hot just below the slot. The aluminum jaws help to keep the stock from slipping in the vise.
Heat 30
The bottom cusp is bent the same way, hot in the vise, using the hammer to upset the grip into the cusp.
Heat 31
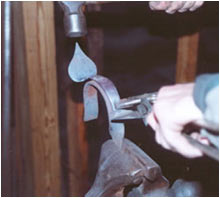
The grip of the latch is heated evenly, taken out of the fire and held onto this jig by a pair of vise-grips and tongs. A hammer bends the stock to its final form.
Straightening the latch
It takes several heats to straighten the cusps and flatten them
Marking for holes
The position of the screw holes on the cusps is drawn using a silver pencil and center-punched. After this is done, the final heats further straighten the latch and make the cusps lie flat.
Assembling the Latch
A hole is drilled for the pin on which the thumber pivots through the slot. A similar hole is drilled through the thumber and a trial pin holds the two together. After adjusting the fit a rivet is used to hold the thumber in the slot.
A finish of beeswax and linseed oil is used on a warm latch to protect the metal and give it a traditional black color. After a couple of days a final paste wax finish is given to the latch.
Drilling the hole
An 1/8 inch hole is drilled into the latch. We use an old hand-operated drill press to do this.
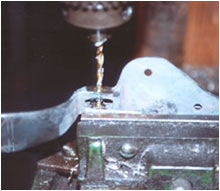
Drilling the latch
This close-up photo shows the hole being drilled in the drill press.
Thumber
The thumber is forged from a piece of 3/8 inch round stock that is 3 1/4 inches long.
Riveting the latch
After trial fitting the thumber and making sure that everything works correctly, a pin is riveted through the slot to hold the thumber. The latch is reheated to put scale on the pin, and then it is ready to finish.
Putting finish on the latch
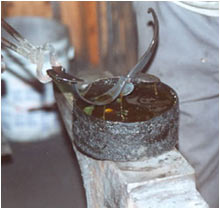
The latch is warmed over the forge and then dipped into a solution of beeswax and linseed oil.
Final warming over fire
The latch with a coating of finish is briefly warmed over the fire to help the wax penetrate all the surfaces. After cooling, excess finish is wiped off.
The Finished Latch
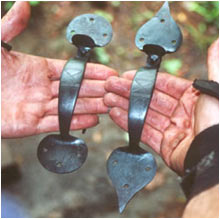
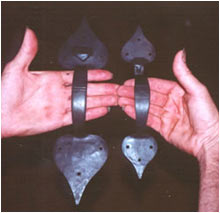
This photo shows two latches after receiving their hot finish. The finish is wiped off after they are cool. The latch to the left is a bean style. The latch to the right is the heart style.
Two finished latches are shown after having the final paste wax. The latch on the left is a heart latch for an exterior door, the one on the right for an interior door. The latch on the left doesn't have a forged slot like the one on the right. Instead a slot is cut through the metal of the cusp. The thumber is held in place in a different fashion.