How I Install a Half-Mortise Lock Posted by Dave Griessmann
We were talking about woodworking projects the other day at work & the topic of drawer locks came up. A co-worker is finishing up a project & was feeling intimidated by the installation of a half mortise lock in a drawer.
He picked up a lock & was getting hung up on trying to center the lock to the drawer because the key pin location was offset on the lock. After he showed me online what he purchased I proceeded to work him through the process. This is how I go about installing them.
I begin by first finding & marking layout lines for the center of my drawer. The next step is to identify if the key pin is centered or not. (Hint: 99% of the time it isn’t!)
Now I lay the lock on the back of my drawer with the key pin on the layout line & aligned to the top of my drawer. Using a mallet, I tap the back of the lock to mark the pin location on my piece. Once that is marked, I measure the size of the lock & transfer the layout to the back of my drawer. (Remember to measure from the center of the pin.)
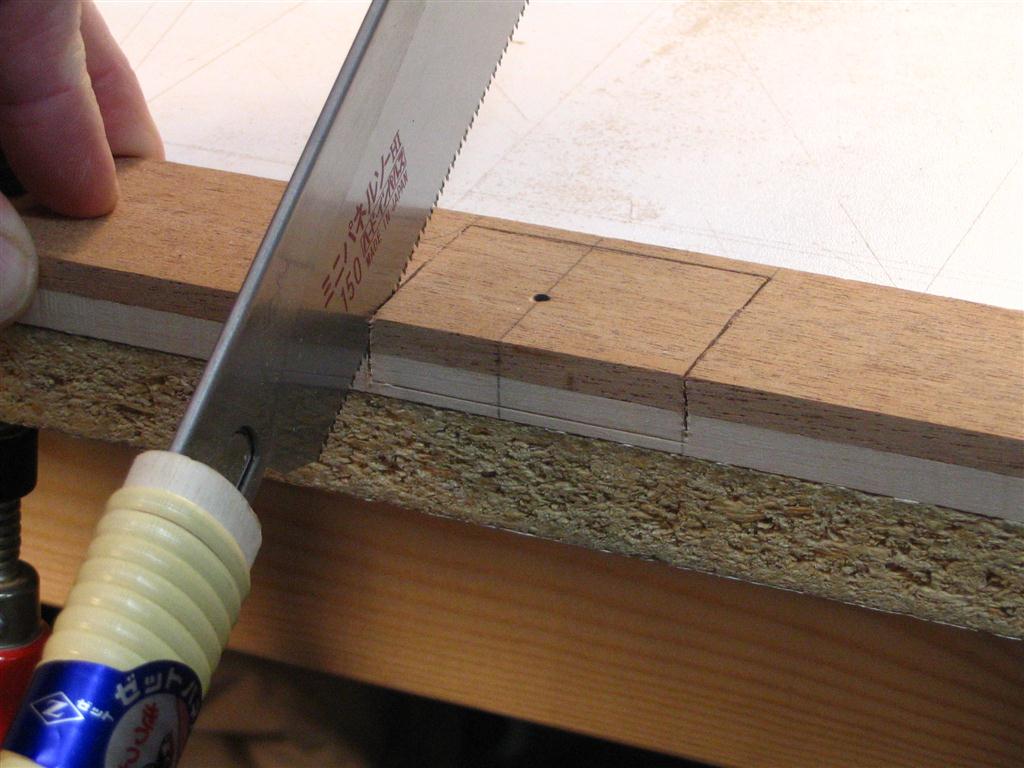
Using a marking gauge, I cut two grooves; one cut for the bottom of the lock & one cut for the selvedge on the top of the drawer. Then using a pull saw, I cut the grooves for the sides.
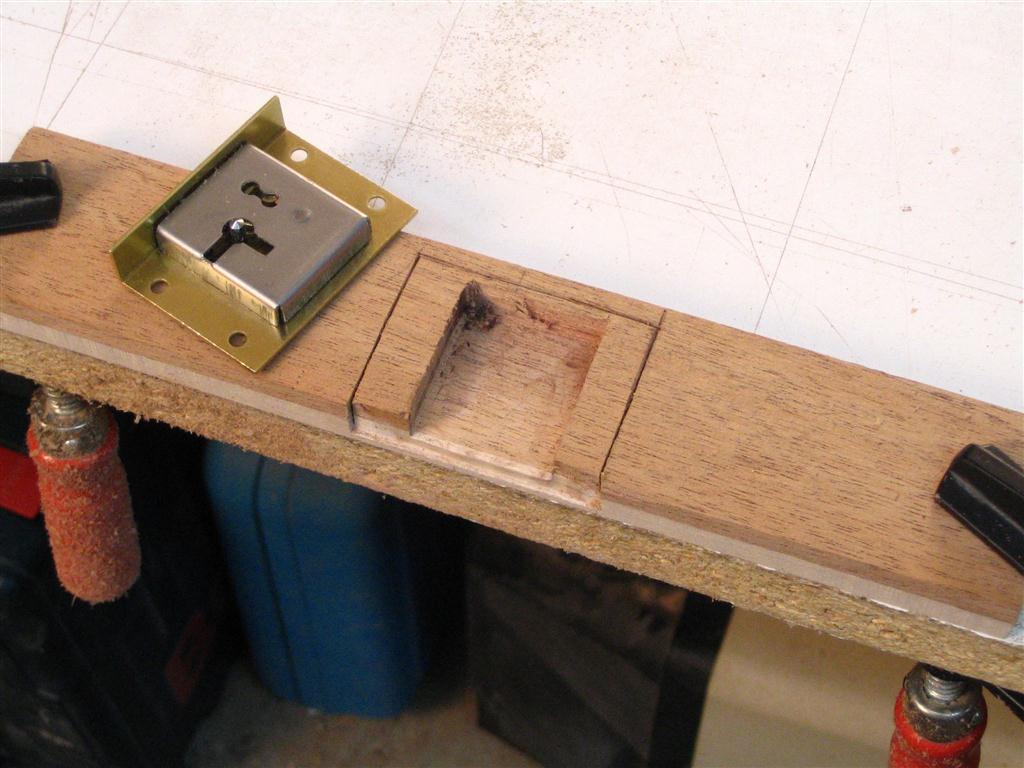
Once complete, I reset my marking gauge to cut in the thickness of the selvedge. Using a chisel, I cut out the thickness of the selvedge at the top of the lock.
My next step is to layout where the main lock mechanism will go in relation to the back of my drawer. From here I set a trim router to cut the depth of the lock & back of the selvedge. Now I plow out the material up to my lines.
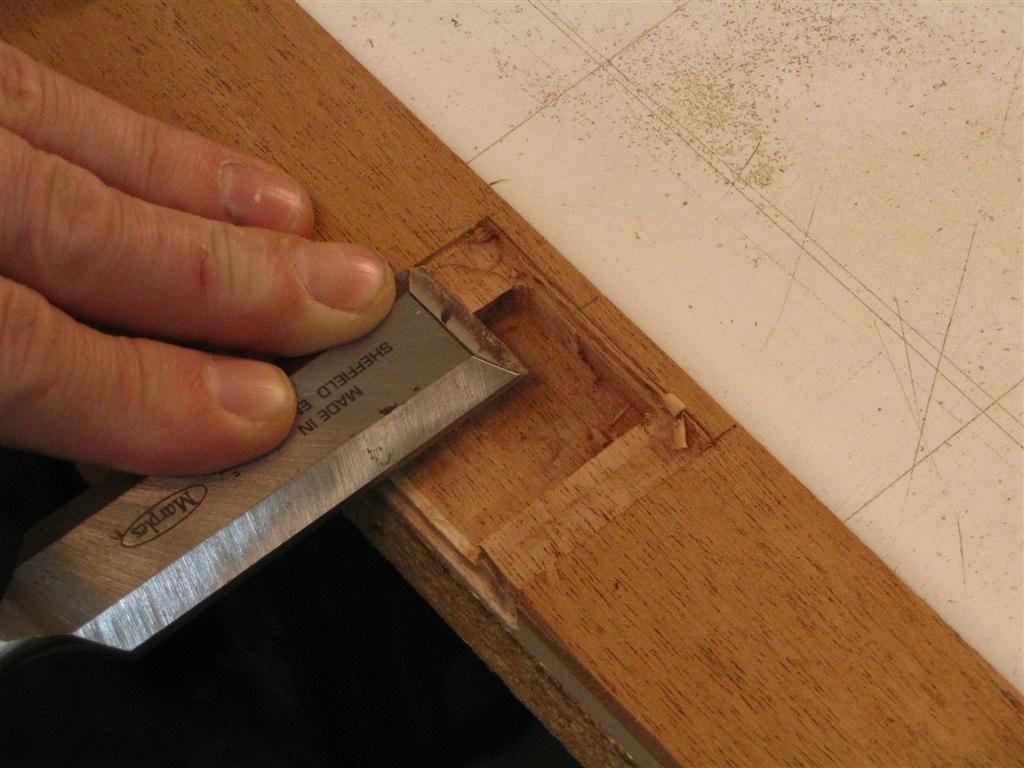
With this complete, I reset the depth of cut on my router to be the thickness of the selvedge on the back of the lock & route up to my outer most lines. Using my chisel, I flatten out & clean up the rest of the wood to the lines.
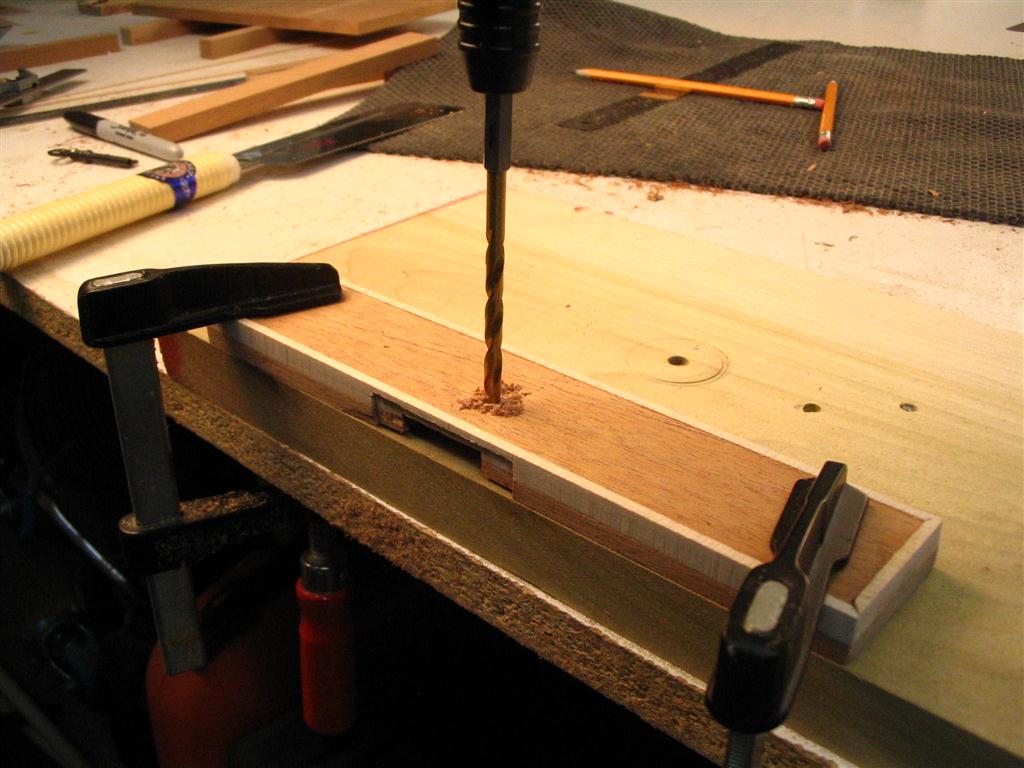
At this point I set my lock & tap it again with the mallet to again show the lock pin. Once located, I drill a 1/16” pilot hole through the drawer.

To avoid blowout on the front of my drawer, I flip the drawer over, chuck the drill with a bit a little bigger than the diameter of the key & drill back through my pilot hole.
At this point I test fit the lock again & perform any clean out that might be needed & install the lock. | 
